When it comes to maintaining the health and performance of your sprayer tank, it’s crucial to know the correct cleaning procedures. You might wonder how many times you should flush the tank to ensure it’s squeaky clean. It’s a simple question, but the answer might surprise you. In this guide, you’ll learn about the precise number of times you need to flush your sprayer tank during its cleaning, backed by expert recommendations and proven best practices. This knowledge will not only maintain your sprayer tank in top-notch condition but also optimize its performance for your projects. So, let’s embark on this enlightening journey to thoroughly clean your sprayer tank.

Understanding the Importance of Cleaning the Sprayer Tank
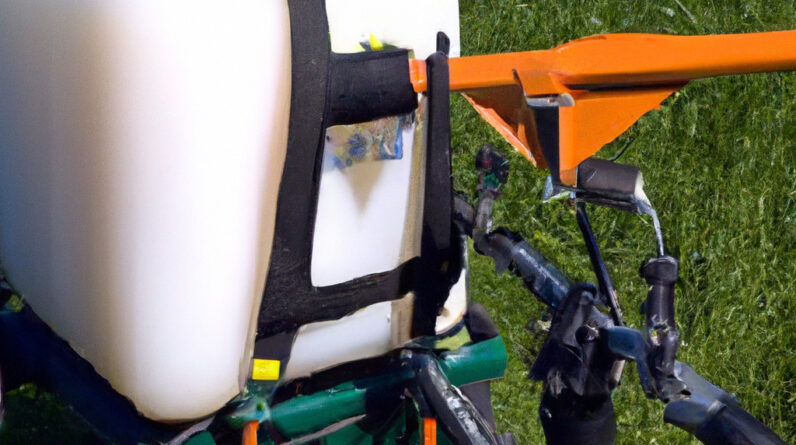
Spray tanks are essential tools for various applications, from pesticide spraying in agriculture to paint and coating applications in industries. However, as you use your sprayer tank, residues of the material you’ve sprayed can build up inside, affecting its performance and potentially damaging the sprayer or the materials being sprayed. Therefore, it’s crucial that you understand the importance of cleaning your sprayer tank.
Why regular cleaning is necessary
Firstly, regular cleaning is necessary to preserve the effectiveness of your sprayer. Without regular cleaning, sediment from old materials can mix with the new ones, affecting their concentration and application rate. Furthermore, some substances can corrode or damage your sprayer over time, leading to unnecessary repairs and replacements.
Benefits of a clean sprayer tank
A clean sprayer tank offers several benefits. It ensures accurate application and consistency, reducing waste and increasing efficiency. Also, it preserves the lifespan of the sprayer, saving you replacement or repair costs. Plus, it eliminates the risks of cross-contamination between different materials that you spray.
Identifying signs of a dirty sprayer tank
To know when to clean your sprayer tank, you need to be able to identify the signs of a dirty tank. Some signs include uneven spraying, a decrease in sprayer effectiveness, blockages, and unexpected residues in the output.
General Guidelines for Flushing the Sprayer Tank
Flushing your sprayer tank regularly is the first step to keeping it clean. This process involves filling the tank with a cleaning solution and using it to spray until the tank is empty.
Initial steps before flushing the tank
Before you start flushing, ensure the sprayer is turned off and disconnected from its power source. Remove any residual liquid from the tank. Also, make sure the area you’ll be doing the flushing is suitable and doesn’t pose environmental hazards.
Choosing the right cleaning agent
The cleaning agent you choose depends on what you’ve been spraying. For general-purpose cleaning, water and mild detergent are usually sufficient. Some materials may require specific cleaning agents, so ensure you refer to the manufacturer’s instructions or consult an expert.
Proper water temperature for flushing
Warm water is often more effective for cleaning, as it helps to dissolve and remove more residue. However, make sure the water is not too hot, as it could damage some parts of your sprayer.
Procedure for Flushing the Sprayer Tank
Flushing the sprayer tank involves several steps and precautions, all aimed at ensuring an effective cleaning without damaging the sprayer.
Step-by-step directions on flushing
Start by mixing your cleaning agent with the right amount of water, following the manufacturer’s instructions. Pour the solution into the tank, ensuring it’s about half full. Swirl the tank to mix the solution and let it sit for a while. After this, turn on the sprayer and let it operate until it’s empty.
Safety precautions during the flushing process
When flushing a sprayer tank, it’s essential to wear appropriate protective gear, especially if the cleaning agent is potentially harmful. Also, don’t point the sprayer at yourself or others during the flushing process.
When to repeat the flushing procedure
Depending on the extent of the residue, you may need to repeat the flushing process more than once. If you notice that residue remains after the first flush, you can repeat the procedure until the tank is clean.
Determining the Number of Flushes Required
The number of times you need to flush your sprayer tank depends on several factors.
Factors affecting the number of flushes
These factors include the type of material previously sprayed, the time elapsed since the last cleaning, and the concentration of the residue. For some very stubborn residues, multiple flushes may be required to completely remove them.
Special cases that require extra flushing
Sometimes, residues from certain materials may be particularly hard to remove. In such cases, you will need to do extra flushing.
Making adjustments based on sprayer tank size
Larger tanks may require more flushes to ensure the cleaning agent sufficiently reaches all areas. Conversely, smaller tanks may require fewer flushes.

Effective Methods for Multiple Flushes
When multiple flushes are necessary, sequential, alternating, and continuous flushing methods can be effective.
Sequential flushing technique
Sequential flushing involves repeating the same flushing process several times until the residue is entirely removed.
Alternating agent flushing technique
Alternating agent flushing technique involves using different cleaning agents in each flushing cycle. This method can be more effective for removing stubborn residues.
Continuous flushing method
Continuous flushing involves continuously flushing the tank with the cleaning solution without breaks. This method requires a large volume of cleaning solution but can be quite effective.
Rinsing After Flushing the Tank
After flushing your sprayer tank, it’s important you give it a good rinse.
The role of a good rinse in the cleaning process
Rinsing helps to remove any leftover cleaning agent or loosened residues. It also prepares the tank for the next usage.
How many times to rinse after flushing
This depends on the cleaning agent used. Some cleaning agents may require multiple rinses to thoroughly remove them.
Rinsing technique for an effectively cleaned tank
Use clean water and rinse the tank as you would during the flushing process. Repeating this process should give you an effectively cleaned tank.
Maintenance Practices After Cleaning the Sprayer Tank
After cleaning, you should follow certain practices to maintain the longevity and effectiveness of your sprayer tank.
Drying and storage of the tank
Ensure to dry your tank before storage. This prevents issues like rust and promotes longevity.
Periodic maintenance checks
Regularly inspect your sprayer for signs of wear and tear. Early detection can save you from expensive repairs later.
Replacement of worn-out components
Replace parts like nozzles and filters as soon as they show signs of excessive wear. This helps to maintain the effectiveness of the sprayer.
Troubleshooting Common Sprayer Tank Cleaning Problems
Sometimes, you may encounter problems when cleaning your sprayer tank.
Issues with incomplete flushing
If flushing doesn’t seem to remove all residues, you might need to use a different cleaning agent or apply more rigorous cleaning methods such as scrubbing.
Dealing with corrosive or hard-to-remove residues
For corrosive or particularly stubborn residues, you may need to use specialized cleaning agents and possibly seek professional assistance.
Overcoming difficulties with particular sprayer models
Some sprayer models may have particularities that make cleaning a bit more challenging. If you encounter such difficulties, refer to the manufacturer’s instructions or consult an expert.
Preventing Contamination Between Uses
To maintain the effectiveness of your sprayer and the materials you’re spraying, it’s important to prevent cross-contamination between uses.
Flushing out previous chemicals before new application
Especially when changing the material being sprayed, it’s essential to thoroughly flush the tank to prevent any traces of the previous material from contaminating the new one.
Best practices for avoiding cross-contamination
Other practices for avoiding cross-contamination include using different sprayers for different materials, cleaning the sprayer immediately after usage, and using the right type and concentration of cleaning agents.
Understanding the risks of contamination
Cross contamination can lead to undesired results like reduced effectiveness of the materials sprayed, damages to the sprayer, and in some cases, also pose health or environmental risks.
Enhancing the Longevity and Performance of Your Sprayer Tank
By regularly cleaning and maintaining your sprayer tank, you can enhance its longevity and performance.
The role of regular cleaning in sustaining performance
Regular cleaning ensures the internal walls of the tank and other components are free from residues that could block or slow down the spraying process, thus sustaining seamless performance.
Other factors contributing to longevity
Other factors that contribute to the longevity of your sprayer tank include using the right type of cleaning agents, proper drying and storage, and adequate maintenance of all components.
Best practices for keeping your sprayer in top shape
These best practices include regular cleaning and maintenance, proper use according to manufacturer’s guidelines, and prompt replacement of worn-out parts.
In conclusion, keeping your sprayer tank clean is a vital part of ensuring its effectiveness and longevity. By understanding the cleaning process, knowing when and how often to clean, and following best maintenance practices, you can get the most out of your sprayer tank.
Contents on This Page
- Understanding the Importance of Cleaning the Sprayer Tank
- Why regular cleaning is necessary
- Benefits of a clean sprayer tank
- Identifying signs of a dirty sprayer tank
- General Guidelines for Flushing the Sprayer Tank
- Initial steps before flushing the tank
- Choosing the right cleaning agent
- Proper water temperature for flushing
- Procedure for Flushing the Sprayer Tank
- Step-by-step directions on flushing
- Safety precautions during the flushing process
- When to repeat the flushing procedure
- Determining the Number of Flushes Required
- Factors affecting the number of flushes
- Special cases that require extra flushing
- Making adjustments based on sprayer tank size
- Effective Methods for Multiple Flushes
- Sequential flushing technique
- Alternating agent flushing technique
- Continuous flushing method
- Rinsing After Flushing the Tank
- The role of a good rinse in the cleaning process
- How many times to rinse after flushing
- Rinsing technique for an effectively cleaned tank
- Maintenance Practices After Cleaning the Sprayer Tank
- Drying and storage of the tank
- Periodic maintenance checks
- Replacement of worn-out components
- Troubleshooting Common Sprayer Tank Cleaning Problems
- Issues with incomplete flushing
- Dealing with corrosive or hard-to-remove residues
- Overcoming difficulties with particular sprayer models
- Preventing Contamination Between Uses
- Flushing out previous chemicals before new application
- Best practices for avoiding cross-contamination
- Understanding the risks of contamination
- Enhancing the Longevity and Performance of Your Sprayer Tank
- The role of regular cleaning in sustaining performance
- Other factors contributing to longevity
- Best practices for keeping your sprayer in top shape