Ever had a gardening session interrupted by a stubbornly clogged sprayer? This guide is just for you then! It’s packed with user-friendly tips and practical advice aimed at helping you tackle a sprayer that just won’t unclog. Be it an aerosol can or a garden sprayer, the methods detailed here are sure to put you back in control of your sprayer and ultimately, your gardening experience. Grab your tools and let’s get it working again!

Understanding Different Types of Sprayers
Having some background knowledge in the types of sprayers can be useful in identifying and addressing issues with your sprayer. Sprayers come in a variety of shapes and sizes, depending on their application.
Types of handheld sprayers
Handheld sprayers are the most common type, and you may have one or two in your home. They are often used for small-scale applications, such as gardening or cleaning. Handheld sprayers come in a pressurized canister form that sprays out a mist when you depress a button, or a pump-action form where you press or squeeze a trigger to release the spray.
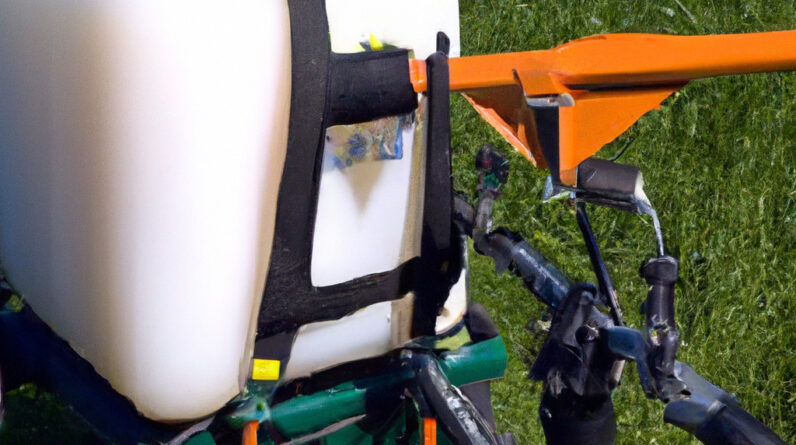
Industrial sprayer types
Alternatively, there are industrial sprayers that are usually larger and more powerful, designed for heavy-duty usage. These include paint sprayers, concrete sprayers, and agricultural sprayers. Given their intense usage, their components can wear down, leading to a variety of issues including clogging.
Understanding how sprayers work
With a basic understanding of the different sprayer types, it’s also beneficial to understand how sprayers work. Essentially, they help to distribute a liquid, such as pesticide or paint, evenly over a surface. When the sprayer’s trigger is squeezed, it applies pressure to the liquid forcing it out through a small nozzle, creating a spray.
Identifying the Problem
Your sprayer may show signs it’s clogged well before it stops working completely, if you know what to look for.
Signs your sprayer is clogged
Some telltale signs that your sprayer is clogged include a weak or uneven spray, leaking, straining sounds from the sprayer, or difficulty depressing the trigger.
Common troubles with sprayers
Beyond clogging, sprayers can face other issues like a faulty nozzle, broken trigger system, or a damaged hose. These damages may cause the sprayer to malfunction in different ways but often, a deep clean fixes many of these issues.
Assessing your sprayer’s condition
Before you start on any repair or cleaning, take the time to thoroughly assess your sprayer’s condition. Look out for any visible damage such as cracks or breaks, verify if the trigger system is working smoothly, and test out the spray.
Gathering Needed Supplies
Once you’ve identified the problem, gather your supplies.
Essential tools for unclogging a sprayer
Some of the essential tools for unclogging a sprayer include a small brush for cleaning, a bowl for soaking parts, and possibly a pair of pliers or a multi-tool to help with disassembling the sprayer.
Sourcing from a hardware store or online
You can find many tools needed at your local hardware store. Alternatively, consider online vendors, where you can often find comprehensive toolkits that have a variety of heads for different purposes.
If a specific tool isn’t available, don’t fret. There are usually alternatives around the house that can be used instead – for example, a toothbrush in place of a small cleaning brush.
Executing Safety Precactions
Safety should always come first when handling sprayers, especially ones that may contain dangerous chemicals.
Protective wear for handling sprayers
During the cleaning process, wear gloves to protect your hands. If the sprayer contains hazardous liquids, consider wearing goggles and a protective apron as well.
Safe work environment setup
Ensure you have a clean, well-ventilated and well-lit workspace to carry out your cleaning procedure. Please don’t work near open flames.
Dealing with chemical products in sprayers
If your sprayer contains pesticides or cleaning chemicals, make sure to dispose of residual liquid properly. Always follow local regulations for chemical disposal.

Initial Cleaning Steps
Before you take apart your sprayer, start with some initial cleaning steps.
Unplugging and emptying your sprayer
Start by unplugging and completely emptying your sprayer if it’s electrically powered. If it’s manually powered, release any remaining pressure and drain all liquid.
Cleaning visible exteriors of sprayer
Wipe the exterior of your sprayer with a wet cloth. This can help getting your work area clean and avoid recontamining the inner parts you’ll clean later.
Flushing internal system with water
For water-resistant sprayers, you can try to flush the sprayer’s system with water. Fill it with clean water and spray it out. This can remove easy to move loose debris. But remember, this is not applicable for all sprayers.
Dismantling the Sprayer
After the initial cleaning, you’re ready to disassemble the sprayer.
Steps in sprayer disassembly
Please follow the user manual to disassemble the sprayer, if one is available. If not, the usual steps involve removing the nozzle, hose, and trigger mechanism.
Keeping track of disassembled parts
As you dismantle your sprayer, keep careful track of each part and where it came from; this makes reassembly easier.
Handling sensitive sprayer parts
Some sprayer parts may be sensitive, such as rubber seals or intricate trigger systems. Handle these with extra care to avoid causing more problems.
Intensive Cleaning Procedures
Once your sprayer is disassembled, it’s time to get rigorous with your cleaning.
Uses of brush in cleaning
A small brush is a handy tool in this phase. Use it to scrape away visible debris from each part without causing damage.
Rinsing procedures for sprayer parts
After brushing, rinse each piece thoroughly. Soak pieces in a mixture of warm water and a mild cleaning solution, then make sure to rinse them well to remove any residue.
Dealing with stubborn clogs
For stubborn clogs that aren’t easily brushed away, a pin or needle can be used to gently remove the obstruction.
Reassembling the Sprayer
After cleaning, you’re ready to put your sprayer back together.
Steps in sprayer reassembly
Again, refer to your user manual if possible. Reassemble in the reverse order of how you disassembled the sprayer, starting with the inner workings.
Watch-outs in reassembly
As you reassemble your sprayer, watch out for misplaced or missing pieces. Ensure that each part fits snugly and securely.
Reattachment of hose and nozzle
The final steps in reassembly usually involve reattaching the hose and nozzle. Make sure these parts are secure to prevent leaks when you use the sprayer.
Testing the Sprayer
Once your sprayer is reassembled, it’s time to test it out.
Executing a dry test run
Before adding any liquids, do a few dry shots with your sprayer to make sure parts are moving smoothly.
Checking for smooth operations
Then, add a bit of water and test the sprayer again. Look out for smooth operation and an even spray.
Monitoring for recurrent or new issues
Also, monitor for any recurring issues or new ones, such as leaks or gaps in the spray pattern. If those issues persist, it might be time to seek professional assistance or consider replacing the sprayer.
Prevention and Regular Maintenance
Preventive care and regular maintenance can help keep your sprayer in good condition and prevent clogs.
Routine cleaning procedures
After each use, empty and clean your sprayer to prevent dried particles from sticking to the inner parts.
Proper storage for sprayers
Store your sprayer properly as well. Keep it in a cool, dry place and make sure it’s fully dry before you put it away.
Investment in regular check-ups and maintenance
Lastly, consider investing in regular check-ups and maintenance, especially if you have an industrial sprayer. With proper care, your sprayer can serve you a lot longer and perform better. Remember, an ounce of prevention is worth a pound of cure!
Contents on This Page
- Understanding Different Types of Sprayers
- Types of handheld sprayers
- Industrial sprayer types
- Understanding how sprayers work
- Identifying the Problem
- Signs your sprayer is clogged
- Common troubles with sprayers
- Assessing your sprayer’s condition
- Gathering Needed Supplies
- Essential tools for unclogging a sprayer
- Sourcing from a hardware store or online
- Alternatives for unavailable tools
- Executing Safety Precactions
- Protective wear for handling sprayers
- Safe work environment setup
- Dealing with chemical products in sprayers
- Initial Cleaning Steps
- Unplugging and emptying your sprayer
- Cleaning visible exteriors of sprayer
- Flushing internal system with water
- Dismantling the Sprayer
- Steps in sprayer disassembly
- Keeping track of disassembled parts
- Handling sensitive sprayer parts
- Intensive Cleaning Procedures
- Uses of brush in cleaning
- Rinsing procedures for sprayer parts
- Dealing with stubborn clogs
- Reassembling the Sprayer
- Steps in sprayer reassembly
- Watch-outs in reassembly
- Reattachment of hose and nozzle
- Testing the Sprayer
- Executing a dry test run
- Checking for smooth operations
- Monitoring for recurrent or new issues
- Prevention and Regular Maintenance
- Routine cleaning procedures
- Proper storage for sprayers
- Investment in regular check-ups and maintenance